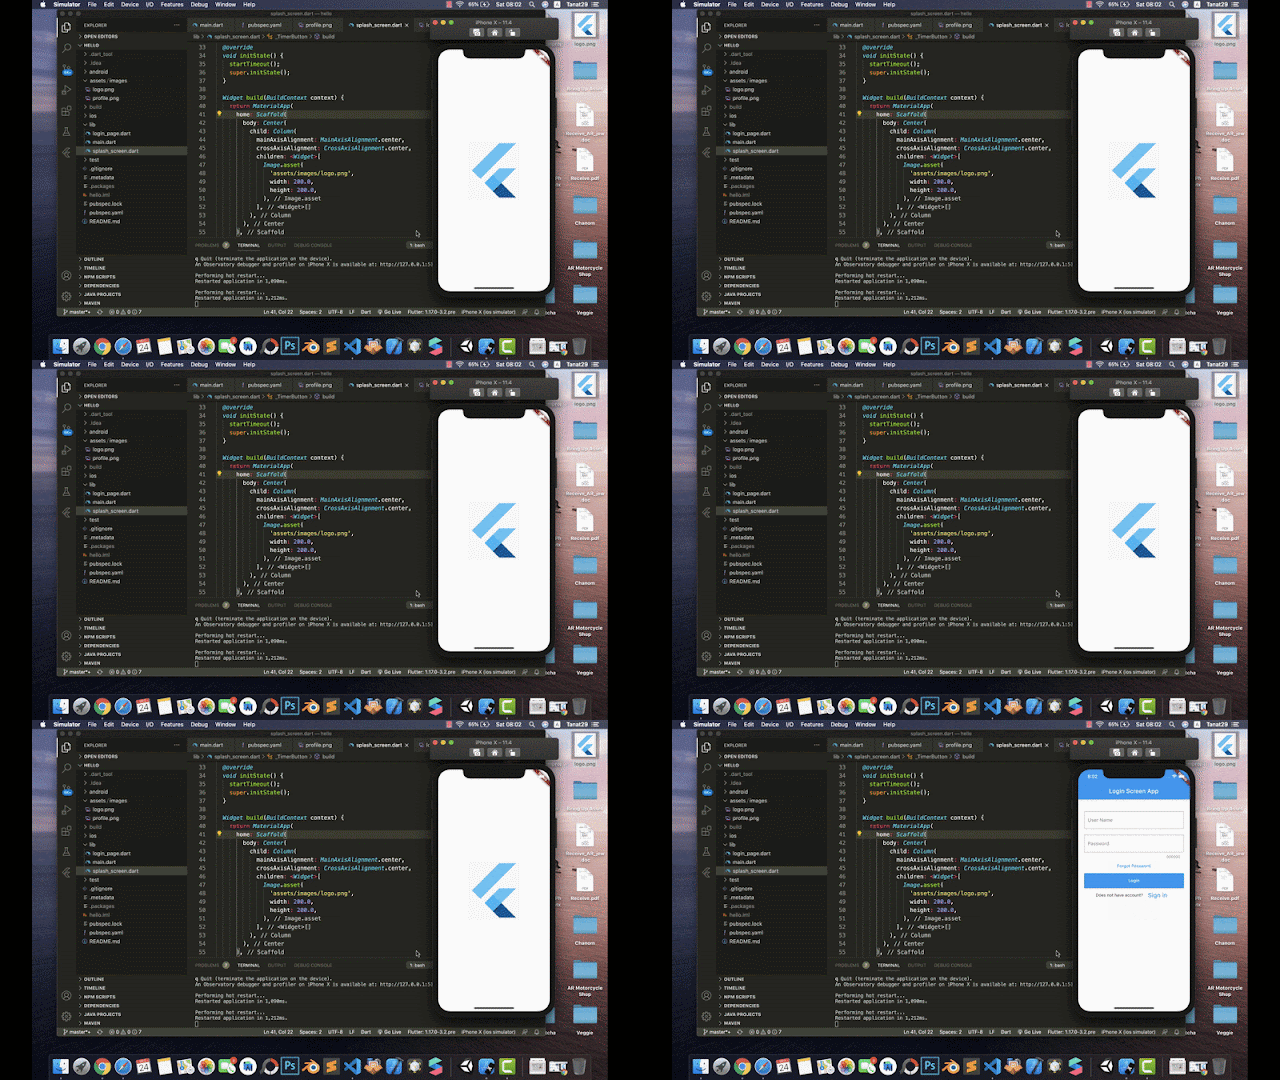
SplashScreen บน Flutter ทำยังไงไปดูกัน
เข้าใจเงื่อนไขของ SplashScreen ก่อน การทำหน้านี้นั้นอารมณ์เหมือนหน้าแนะนำแอพก่อนเข้าระบบ ซึ่งแต่ละแอพก็จะมีวิธีการใช้งานต่างกัน แต่ตัวอย่างนี้จะเป็นการรอ 4 วินาที แล้วให้รันไปหน้าถัดไปนะครับ
อธิบายโค้ด
final interval = const Duration(seconds: 1);
final int timerMaxSeconds = 4;
int currentSeconds = 0;
กำหนดระยะเวลารันเป็น 1 วินาที
กำหนดระยะเวลาสิ้นสุดเป็น 4 วินาที
กำหนดระยะเวลาเริ่มต้นที่ 0 วินาที
@override
  void initState() {
    startTimeout();
    super.initState();
}
เมื่อเปิดมาแอพจะรันที่ Method initState() ก่อน โดยจะเข้า startTimeout() เพื่อเริ่มนับเวลา
startTimeout([int milliseconds]) {
    var duration = interval;
    Timer.periodic(duration, (timer) {
      setState(() {
        currentSeconds = timer.tick;
        if (timer.tick >= timerMaxSeconds) {
          timer.cancel();
          Navigator.pushReplacement(
            context,
            MaterialPageRoute(builder: (context) => LoginPage()),
          );
        }
      });
    });
  }
เมื่อเข้า startTimeout ก็จะเริ่มทำการนับเวลาไปตามเงื่อนไขของโค้ด และเมื่อครบ 4 วินาที ตัวแอพก็จะรันไปยังหน้าถัดไปทันทีจากโค้ด Navigator.pushReplacement เพื่อไปยังหน้า Method LoginPage() ไปยังหน้า login.dart ต่อไป
โค้ดในโฟลเดอร์ lib ทั้งหมด
ไฟล์ main.dart
1 2 3 4 5 6 7 8 9 10 11 12 13 14 15 16 17 18 19 | import 'package:flutter/material.dart'; import 'package:hello/splash_screen.dart'; void main() { runApp(MyApp()); } class MyApp extends StatelessWidget { @override Widget build(BuildContext context) { return MaterialApp( title: 'Flutter Firebase Authentication Demo', theme: ThemeData( primarySwatch: Colors.blue, ), home: SplashScreen(), ); } } |
หน้าแรกสำหรับแอพพลิเคชั่น เมื่อแอพเปิดมาจะรันไปยังหน้า splash_screen.dart ทันที ผลจากบรรทัดที่ 16
ไฟล์ splash_screen.dart
1 2 3 4 5 6 7 8 9 10 11 12 13 14 15 16 17 18 19 20 21 22 23 24 25 26 27 28 29 30 31 32 33 34 35 36 37 38 39 40 41 42 43 44 45 46 47 48 49 50 51 52 53 54 55 56 57 58 | import 'package:flutter/material.dart'; import 'dart:ui'; import 'dart:async'; import 'package:hello/login_page.dart'; class SplashScreen extends StatefulWidget { @override _TimerButton createState() => _TimerButton(); } class _TimerButton extends State<SplashScreen> { final interval = const Duration(seconds: 1); final int timerMaxSeconds = 4; int currentSeconds = 0; startTimeout([int milliseconds]) { var duration = interval; Timer.periodic(duration, (timer) { setState(() { currentSeconds = timer.tick; if (timer.tick >= timerMaxSeconds) { timer.cancel(); Navigator.pushReplacement( context, MaterialPageRoute(builder: (context) => LoginPage()), ); } }); }); } @override void initState() { startTimeout(); super.initState(); } Widget build(BuildContext context) { return MaterialApp( home: Scaffold( body: Center( child: Column( mainAxisAlignment: MainAxisAlignment.center, crossAxisAlignment: CrossAxisAlignment.center, children: <Widget>[ Image.asset( 'assets/images/logo.png', width: 200.0, height: 200.0, ), ], ), ), ), ); } } |
เมื่อรอ 4 วินาทีจากหน้า splashscreen.dart เสร็จแล้วจะรันไปหน้า login_page.dart ต่อ
ไฟล์ login_page.dart
1 2 3 4 5 6 7 8 9 10 11 12 13 14 15 16 17 18 19 20 21 22 23 24 25 26 27 28 29 30 31 32 33 34 35 36 37 38 39 40 41 42 43 44 45 46 47 48 49 50 51 52 53 54 55 56 57 58 59 60 61 62 63 64 65 66 67 68 69 70 71 72 73 74 75 76 77 78 79 80 81 82 83 84 85 86 87 88 89 90 91 92 93 94 95 | import 'package:flutter/material.dart'; class LoginPage extends StatefulWidget { @override State<StatefulWidget> createState() => new _State(); } class _State extends State<LoginPage> { TextEditingController nameController = TextEditingController(); TextEditingController passwordController = TextEditingController(); @override Widget build(BuildContext context) { return Scaffold( appBar: AppBar( title: Text('Login Screen App'), ), body: Padding( padding: EdgeInsets.all(10), child: ListView( children: <Widget>[ Container( alignment: Alignment.center, padding: EdgeInsets.all(10), ), Container( padding: EdgeInsets.all(10), child: TextField( controller: nameController, decoration: InputDecoration( border: OutlineInputBorder(), labelText: 'User Name', ), ), ), Container( padding: EdgeInsets.fromLTRB(10, 10, 10, 0), child: TextField( obscureText: true, controller: passwordController, decoration: InputDecoration( border: OutlineInputBorder(), labelText: 'Password', counterText: '000000'), ), ), FlatButton( onPressed: () { //forgot password screen }, textColor: Colors.blue, child: Text('Forgot Password'), ), Container( height: 50, padding: EdgeInsets.fromLTRB(10, 0, 10, 0), child: RaisedButton( textColor: Colors.white, color: Colors.blue, child: Text('Login'), onPressed: () { LoginMethod(context); }, )), Container( child: Row( children: <Widget>[ Text('Does not have account?'), FlatButton( textColor: Colors.blue, child: Text( 'Sign in', style: TextStyle(fontSize: 20), ), onPressed: () { /* Navigator.push( context, MaterialPageRoute( builder: (context) => RegisterApp()), ); */ }, ) ], mainAxisAlignment: MainAxisAlignment.center, )) ], ))); } void LoginMethod(BuildContext context) { String Email = nameController.text.trim(); String Password = passwordController.text.trim(); } } |
สำหรับใครที่ต้องการให้รันไปหน้าไหน ให้ใส่โค้ด Navigator.push ในบรรทัดที่ 77-80 ได้เลย เมื่อกดปุ่มก็จะรันไปยังหน้านั้นๆ
ส่วน LoginMethod ก็เป็นการรับค่า Email , Password มาจาก TextField มาเพื่อนำไปใช้ login ต่อไป


ความคิดเห็น